How to Fix a Door Handle: The Complete Step-by-Step Guide for a Smooth Repair

 16 August 2025
A faulty door handle isn’t just an inconvenience; it’s a daily frustration. Whether it’s loose, sticking, or completely broken, knowing how to fix a door handle can save you time, money, and unnecessary stress. In this post, we’ll walk you through the repair process and show you why Modolur1’s Door Handle is a worthy upgrade for long-lasting performance.
Understanding the Importance of a Functional Door Handle
A door handle isn’t just a piece of hardware; it’s the first point of contact when entering a space. A smooth, reliable handle ensures security, comfort, and a welcoming feel.
Why Door Handles Fail Over Time
- Wear and Tear. Constant use weakens screws and moving parts.
- Environmental Factors. Humidity, dust, and rust can damage components.
- Improper Installation. Misalignment causes strain on the mechanism.
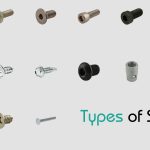
Common Types of Door Handles and Their Mechanisms
- Lever Handles
- Knob Handles
- Pull Handles
- Mortise Handles
Each type has its own fixing approach, so knowing your handle type is key.
Tools and Materials You’ll Need for Fixing a Door Handle
Basic Tools for Simple Repairs
- Screwdriver set
- Allen wrench
- Lubricant spray
- Replacement screws or latch parts
When to Consider Replacing Instead of Repairing
If the internal latch is broken or the finish is severely worn, repair may be temporary. That’s when upgrading to Modolur1’s Door Handle makes sense: modern design, high durability, and smooth mechanics.
Step-by-Step Guide. How to Fix a Loose Door Handle
Step 1. Identify the Problem
Check if the handle wobbles, doesn’t latch properly, or sticks.
Step 2. Tighten the Screws or Bolts
Use a screwdriver or Allen key to secure loose screws.
Step 3. Align the Latch and Strike Plate
Misalignment causes difficulty in opening and closing. Adjust the plate to match the latch.
Step 4. Lubricate Moving Parts
A light application of lubricant reduces friction and wear.
Step 5. Test the Handle Function
Ensure smooth operation before closing up.
How to Fix a Sticking or Jammed Door Handle
Common Causes of Sticking Handles
- Dust buildup
- Rust formation
- Worn internal spring
Easy DIY Fixes for Smooth Operation
- Clean the handle with a damp cloth.
- Apply silicone-based lubricant.
- Replace worn springs if necessary.
When to Replace a Door Handle Completely
Signs Your Door Handle is Beyond Repair
- The internal mechanism is broken
- Severe rust or corrosion
- The handle design is outdated
Benefits of Upgrading to Modolur1’s Door Handle
- Premium Build. Long-lasting stainless steel design.
- Smooth Mechanism. Zero jamming with daily use.
- Modern Style. Matches any home décor.
- Easy Installation. No special tools required.
Installing Modolur1’s Door Handle. Quick Guide
Why Modolur1’s Door Handle Stands Out
Unlike generic handles, Modolur1 combines durability, smooth action, and style. It’s engineered for years of use without wobbling or sticking.
Step-by-Step Installation
- Remove the old handle.
- Align Modolur1’s handle with the door holes.
- Secure with included screws.
- Test for smooth action.
Maintenance Tips to Keep Your Door Handle in Top Shape
Regular Cleaning and Lubrication
Wipe handles weekly to remove dust and apply lubricant every 6 months.
Preventing Loose Screws and Misalignment
Check screw tightness quarterly to avoid wobbles.
Conclusion
A working door handle adds ease and elegance to everyday living. Whether you’re tightening screws, realigning parts, or doing a full replacement, the process is straightforward. And when it’s time for an upgrade, Modolur1’s Door Handle delivers unmatched durability, smooth function, and modern style, making it the ultimate choice for your home.
Frequently Asked Questions
1. Can you fix a door handle without removing it completely?
2. What’s the best lubricant for door handles?
3. How long does Modolur1’s Door Handle last?
4. Is it hard to install Modolur1’s Door Handle myself?
5. Can you use Modolur1’s handle on both left and right-opening doors?
6. What makes Modolur1 better than generic handles?